Thursday, October 25, 2012

DIY: Furniture Stenciling

If I could get $1 for every time a project started with a random search on Craigslist, I would be so wealthy.
This project started with a search for a headboard.  I found an entire bedroom set for $200 and talked the owner into $140.  1 Queen Headboard, 2 night stands and an ENORMOUS dresser.
Thinking of all of the possibilities made me giddy.

First the hard part, my least favorite...sanding. 
I am so lucky to have a slave to do it for me.
Scroll down below to see before and in-progress images.


During the sanding process I did a little research to figure out what I wanted the end result to be.
I decided on white paint, and yellow accents.  I fell in love with this stencil set on Amazon from Martha Stewart...


After sanding, the priming started.  
I did 2 coats primer (3 on the grooves and curves) letting dry at least an hour in between.


Then I painted the furniture the color POLAR BEAR from Home Depot Behr Paint.


It was easy for me to decide where I wanted the stenciling to be.
Each night stand had a carved area on top, decision made!
The head board had a long rectangular cut out as well, decision # 2 made!
On the dresser, I kept it simple and only stenciled the drawers.

I painted the area I wanted stenciled with my favorite CITRUS ZEST Home Depot Behr Color.


STENCILING HOW-TO:

I followed the simple directions on my stenciling kit:
Measure out where you would like stenciling to be
Clean surface of any dust or debris
Tape Stencil in place 
Apply paint with a dry brush technique
Let dry
Apply another coat of paint
Carefully peel stencil away from furniture

Dry brush painting (if you aren't familiar) is using a brush dipped in paint, and then wiped on a towel or sponge so that a sparse amount of paint comes off the brush.  It will remind you of chalk and if using white paint will look chalky as well.


After it dries, peel off carefully making sure to remove all tape.


WARNING: Stenciling takes a lot longer than you think it will.
Most of that time is waiting for paint to dry.
So make sure you have some musical tunes or a TV show to keep you company.

Next you match up your stencils to the pattern already painted and repeat your dry brush technique!
The dryer the better, it will take longer, but the paint won't bleed.


I added another couple of steps to make sure my furniture was going to last.

1. I lightly sanded the paint ridges to make the surface smooth.
If you choose to do this use a very fine grit sand paper.  This allows you to smooth out a project without taking away your painted finish.

2. Varnish. This varnish below is my favorite because it glides on like water, and truly dries Crystal Clear.
You won't end up with any yellowing if using a light color paint.
I did 2 coats on all furniture pieces.

The finished products!

Nightstands
I used as end tables in our family room


HEADBOARD

Long Dresser
Used as fabric and craft storage in my living room
These pictures were taken from my phone so they aren't as crisp.


I would do this again in a heart beat if I knew for sure it would turn out just as cute.
Although, Mod Podging cute scrapbook paper where I wanted would have been so much faster. :)

Cheers,


Wednesday, October 24, 2012

Tween Room Redo with Stenciled Headboard


Who has a tween daughter?  Mine just magically became one overnight.  I am not sure if you remember her last bedroom redo...it was all about bright colors, flowers, and birds.  

With the tween years upon us, she just wants to feel like a big kid now.  

To distract from the emotional, dramatic, sassy-ness of it all...I decided to throw in a new room design to make her feel more grown up.   After all...feeling more grown up makes you act more grown up right?  {right.}

Before...a little unorganized with potential...
The bed was in the middle of the room which was symmetrical,
but took up a little too much space.

Now!  Grown up with some flair!
She chose the turquoise and yellow combo herself, and I was so happy!
They are two of my favorite three colors. :)

We also moved her bed to the wall adjacent to the cute windows.  It opened up more space on the opposite wall for storage and a homework station.


She now has her own little accessory station right next to her closet.
She can get dressed and then accessorize and check in the mirror just to make sure she likes it!


My favorite part, the headboard!  
Found on Craigslist as an old 1950's piece,
and redone with stenciling!  The picture below was during the sanding process...

Now a creamy white and yellow make it a whimsical girly piece!


I think overall it was a success!  We accomplished organizing ALL of her books and clothes
and kept it cute at the same time!

Look soon for a stenciling how-to!

Cheers,


Thursday, October 18, 2012

DIY: Poor Sad Coffee Table to Super Chic Ottoman


A couple of months ago I found this tutorial from Newlywed McGee's while browsing Pinterest.  
I couldn't believe how easy it looked to transform a coffee table into an ottoman.
What was even better is that I already had this poor little coffee table in my garage, waiting for a makeover.
It was stained with marker, nail polish and dented from child crafts...

I even spied some permanent marker underneath once I took the legs off.

I followed the instructions from the NewleywedMcgees, skipping around a little, and
of course in my rebel style tried some short cuts.  Here is my step by step!

Steps To a DIY Ottoman:
1. Sand your table
I took the legs off, and sanded down the part of the table that would be showing in the finished project.
FYI - Legs to any piece of furniture are a lot easier to sand prime and paint when detached.

2. Prime furniture
I primed the part of the coffee table that would be showing as the end result.

3. Reattach legs
Once sanded, primed and painted, I reattached the legs.

4. Cut foam to fit top of table
I  bought 2 1/2 yards of 2 inch thick foam from Joann fabric.
I measured out the foam to completely cover the top of my coffee table.
MAKE SURE YOU USE A COUPON!!!  This foam is very expensive.  
The 40% off Joann coupon I used made me so happy.

It required a little bit of puzzle piecing to get the top covered because my table was wider than the foam.

5. Glue foam in place.
I used simple craft glue to keep the foam in place.  Just add a big squiggle of glue all over, and leave the foam to adhere.  You will want the foam to stay in place to make for an easy assembly of your ottoman.

Put something heavy on top while the glue dries.

6. Cover foam table top with batting.
I purchased a roll of batting in twin size for my 36 x 36 inch table top.  Once the glue is dry, place your coffee table top down onto batting and get ready to staple it to your table.
Tips to attaching batting: Pull it tight but be careful to not let it tear.

Try to make an even "seam" in the batting at the corners to keep bulging to a minimum.

7.  Staple it in place!
I stapled at each corner, and 3 - 4 staples along each side.


8. Trim off excess batting

Now your table is ready to cover with fabric!

This fabric is called Duralee Putnam from fabric.com.
Remember: You can ALWAYS find fabric.com coupons online!

9. Drape your fabric over your soon-to-be-ottoman, 
and center it where you want it.

10. Staple fabric in place once under each side
Make sure it looks the way you want it before you turn your table upside down.

11. Flip your table over, and staple fabric under the table top.

I went a little crazy with the staples, but I really wanted to make sure it was a tight fit.
I started with the middle and worked my way to the corners, being careful to make a tight seam at each corner for minimal bulging.

12. OPTIONAL: Add tufting and/or nail-heads for extra appeal!
I added 3 nail-heads on each corner for a little umph. 

EASY TUFTING
1. Measure - Start in the middle
Measure corner to corner and mark lightly on fabric where you want to place your first staple.
Measure out where each nail-head will be placed before you start.

2. Start with stapling.
Place a small (tiny) piece of fabric at each stapling point to reinforce fabric.
Press staple gun until you can tell it is firm against the wooden table top and staple it!

3. Hammer in a nail-head directly over staple covering it.


4.  Continue process until all of your nail-heads are firmly in!


5. Sit back and enjoy your handywork!


Can you believe the transformation?!?!
Have fun DIY-ing!

Cheers, 

Tuesday, September 25, 2012

Long time no see? Some New Pintastic finds!

I have been feeling a bit guilty because of my absence.  Pregnancy the 4th time around is just plain hard.  Lucky for my conscience, and this blog...my energy has begun to come back!  I am in full nesting swing...which includes one or all of the following; organizing, throwing away, crafting, purging, sanding, more organizing and more throwing away...really the list is never ending.  I have way too many things I want to finish before baby Leo arrives on or before Christmas Day 2012!

From these Pintastic finds perhaps you can guess what I may or may not be working on right now...

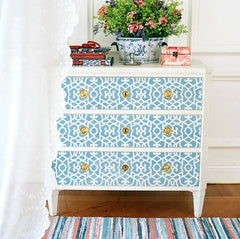
Darling stenciled dresser (and tips I might add) from
learn how to stencil with Moroccan furniture stencils

AMAZING stenciled floor from

The Coolest Stenciled Fireplace also from
stencil a faux tile fireplace surround

Adorable Stenciled Headboard by
headboard DIY

Do you see a common theme yet?
Did you notice the word "stenciling" mentioned more than once?

In the new modern theme of stenciling...and my favorite past time of refinishing...
please come back SOON to see my finished product(s)!!!
Cheers,