Friday, April 29, 2011

April Showers Bring May Flowers!

I promised many tutorials from the room make-over of Little Gal's room, and here is the first one!
Tissue Paper Flowers!

Sassy did a tutorial on Tissue Puff Balls a while back, and this project is very similar.  The fun part is that tissue puffs and flowers aren't only for birthdays anymore!  I would suggest reading the whole tutorial first so that you don't get confused following each step.  It is super easy, but hard to explain via blog...

What you will need:
Tissue Paper (I used 12 sheets per flower in 3 colors or more)
Scissors


I actually got my tissue paper for this project from the Dollar Tree store!
You can get 25 sheets for $1.00 and they are fairly large (20" x 20").

Step 1:  Decide what colors you want the flower to be.
I am making a hot pink and light pink flower with green leaves and a yellow center.

I used...
3 green sheets
3 light pink sheets
3 hot pink sheets
3 yellow sheets

Step 2: Cut and Fold!
Once you have your color combo decided, you have one more decision to make...
Do you want your edges pointy or rounded?  Accordion fold each color section and then cut the end.  For pointy edges cut each end like a triangle, for rounded edges cut each end like a half circle.
For the yellow center I cut straight lines inward toward the center.


What I did:
3 green - pointy (triangle)
3 light pink - rounded (half circle)
3 hot pink - rounded
3 yellow - 

You will accordion fold each section, and then cut the ends.


Both ends cut (below)


Unfolded it looks like this!


Step 3: Layer it up!
Once you get all of your edges cut, you will layer all of your sheets on top of one another.
I layered mine as: green, hot pink, light pink, yellow.  Also, I wanted my yellow paper to be a "center" to my flower, and so I made it 1 inch shorter on each side to add some depth.


Step 4: Secure with your Pipe Cleaner
Once layered, take your pipe cleaner and wrap it around the center of your folded tissue.
On this flower I looped it at the top (the back of the finished flower) and secured the loop by wrapping the pipe cleaner around itself.  The loop is great for hanging.  


Step 5: Fan it out!
Stretch your accordion folded papers outward to form a circle.


Side view...


Step 6: {Light} Lifting
Lift the paper one sheet at a time toward the center of your flower.
Here is the yellow finished (below)...


Then the light pink...


Then the hot pink...


And the green!


Back view.


Voila!  A Happy fancy girly piece of decor for a party or a room!


Where will you hang your flowers?

Cheers, 


Thursday, April 28, 2011

Flip Flop Mama...

A while back, I posted about Flip Flop Mama holding a fabric fundraiser to collect fabric for quilts to send to Japan.  She is amazing, so amazing that she is having a contest right now on her blog too!

To celebrate her 600th post, she is giving away one of her handmade items in her Etsy shop!

I picked my favorite...so swanky!

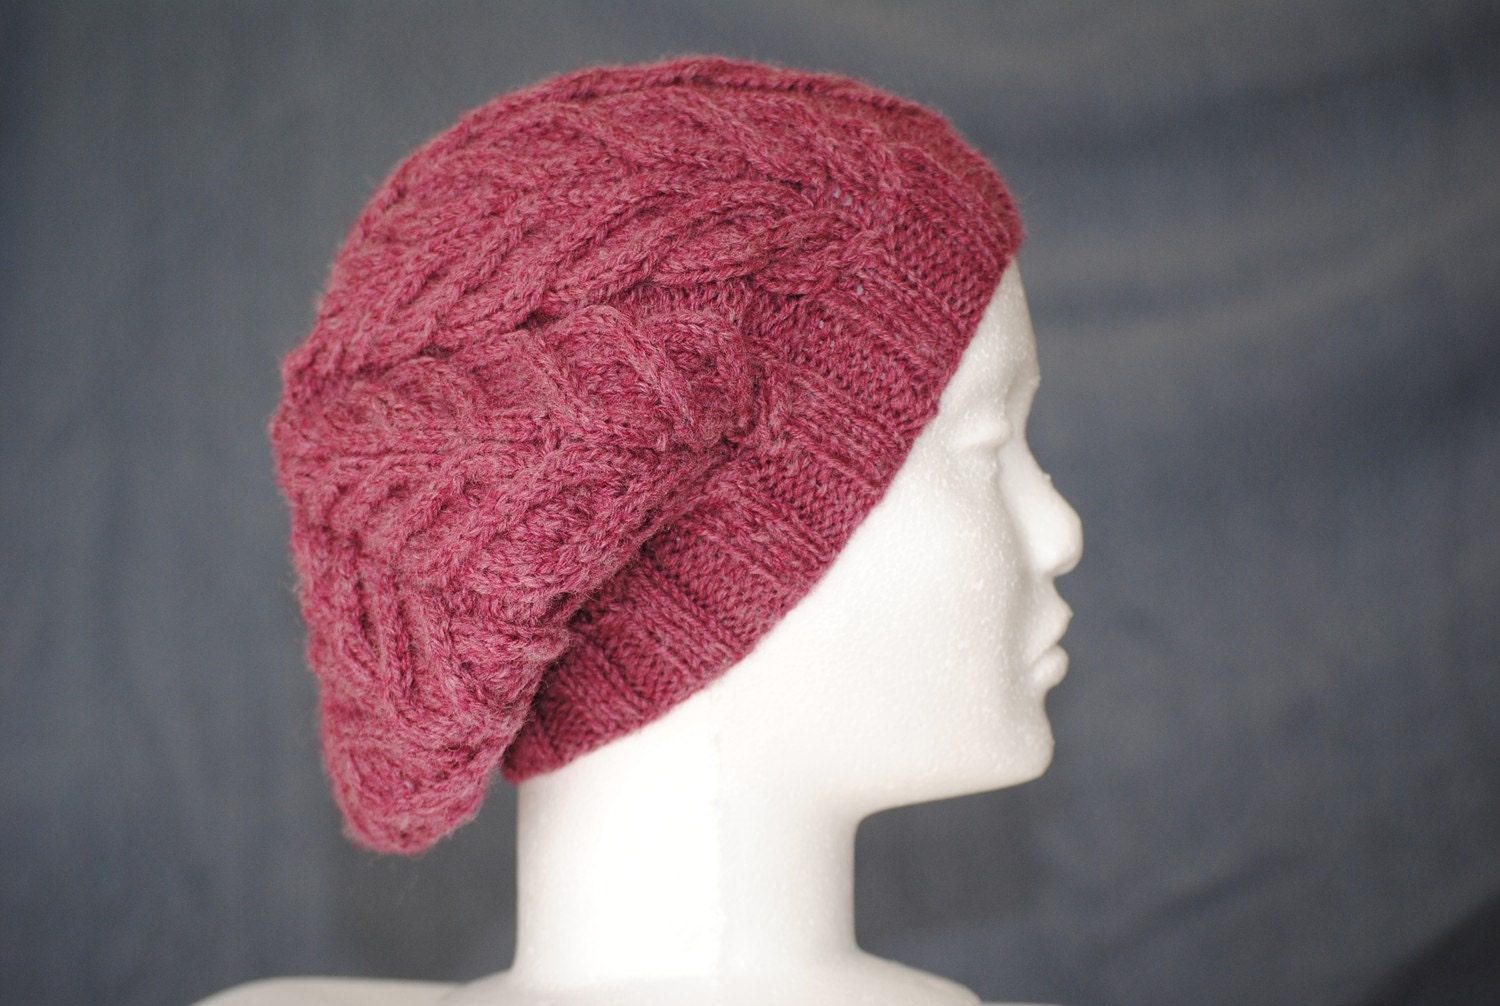
Knitted Slouchy Cabled Hat

What is your pick?

                                                               Cheers,

Tuesday, April 26, 2011

Room Redo!

Little Gal has been asking for her own room forEVER, or... for at least a year now.
My first opinion on the matter was "no way, she is only 8"!  But the sibling rivalry begged to differ.  And so it was decided...Little Gal and Little Sis would split up into their own bedrooms.  It has actually been really great for them to each have their own space.

With much regret...this was her old sad room.
It is sooooo dark and dreary isn't it?
We tried adding some paper flowers to bring some sort of happiness into the poor, dark, sad room. :(


When Little Gal mentioned a bird theme...I almost freaked out.
I had this whole idea in my head of a French room.  What little girl wouldn't love hot pink and Eiffel towers!?!
But, then I thought about how Little Gal loves nature and flowers and trees...and birds are kind of cute.
It was then that I knew it would be perfect for her...and the wheels started turning.

VOILA!
Let me introduce to you, "Romantic Bird Studio"...
Little Gal chose her favorite colors of Hot Pink and Turquoise!


The details all coordinated...
Bird, swirly pink, and yellow fabric (all from Fabric.com) made into a duvet...


Ruffles on a tiny pillow, and bows on the bedding...


Turquoise furniture (DIY), distressed and glazed...


Vinyl Bird Decals (Amazon.com) on the wall and furniture...


Bird cages (Amazon.com) and bird houses...
  

A small floral detailed mirror (Home Goods, $15.99)
  

Vintage Crystal knobs (eBay)...
  

Little Gal now sleeps soundly without the pitter-pat of Little Sis throwing things to the top bunk.
Her room is also the cleanest in the land because she has a place to put everything!

All in all, it was the best thing to give her a room of her own.
I am a little jealous of the hot pink and turquoise, and I don't know how Mr. Pepper would feel about giant paper flowers above our windows, but it works for Little Gal's style!

More good news...I have a boatload of tutorials from the redo!
Stay tuned...

                                                              Cheers,


Wednesday, April 20, 2011

Spring Savings

I have had a few conversations with Sassy lately, about couponing.  I really really really want to try it, but unfortunately I can't even imagine going to the store every week, so everyday would scare the you know what out of me!

My Little Man (who just turned 2 by the way) would have nothing of the sort.  I honestly have 5-7 minutes before a full blown tantrum each time I enter a store/office/school ...you name it!  My days of browsing are over. :(  Hats off to you ladies who do it anyway with tantrum throwing tots.  Please share your success stories with me to give me the courage!

In the meantime, I am still loving Amazon Mom!

Little Sister, who is also my "spirited" child, sleeps so well at night that she still has to wear pull-ups.  I never thought I would still have to buy diapers for a 5 year old.  The most annoying thing?  They are so expensive!

So I shopped around...

Good Deal: Target.com
Underjams - $15.49 for 27
Free Shipping with $50 minimum order

Great Deal: Walmart.com
Pampers Underjams - $22.98 for 50
Free Shipping to Home

AMAZING Deal: Amazon.com
Pampers Underjams - $22.99 for 50...OR $16.09 for 50 with subscribe and save
PLUS Free 2 day shipping - TO MY DOOR!

This was my checkout below...

Amazon Prime Member
Items:$22.99
Shipping & Handling:$0.00
Subscription Discount-$6.90
Total Before Tax:$16.09
Estimated Tax:$0.00
Order Total: $16.09


They will be on my doorstep Friday...I know, because I have been doing it already with wipes and diapers for my Little/Big 2 Year old boy!

If you join Amazon mom, you get a three month FREE membership to Amazon Prime.  Amazon Prime items ship 2 days to your doorstep FREE.  And, if you use the subscribe and save option, you get an extra 30% off your items!  I subscribed to have the Pampers Underjams come every 2 months...but I can change or cancel that at any time.  Also, Amazon will send me an email a few days before they charge my account and ship my items.  I love that feature because I can use any and all reminders I can get!

Just sharing the love...and wealth!

                                                                    Cheers,


Tuesday, April 19, 2011

Super Cute {Super Easy} Springtime Thank you's!

Remember the Super Hero Baby Boy Shower that I threw for my friend?


Well, her bouncing baby boy has come, and he is as darling as ever.
Something else that is as darling as ever, were her thank you gifts for the shower!  
She gave me some hand made cards to use as I please!


To make them yourself:
1). Cut out your favorite shapes in some cute scrapbook paper.
2). Stack them up.  She used 3-4 cut outs of each shape to add more dimension.
3). Sew them right onto the card in one easy straight line!


I think her placement of them in the corners was my favorite part. 
I love asymmetrical things.


Do you have someone you need to thank?

                                                                Cheers,