Tuesday, June 29, 2010

Tea Party Plates!

Did you read my tutorial on E-6000 adhesive and how to make a fabulously cute candy dish or cake stand? Did any of you make a cute candy dish or cake stand?
If you have yet to try out E-6000 adhesive, here is yet another choice for you...

The Tea Cup Treat Stand
Who said tea cups are only for tea?
I discovered these mix and match plates and tea cups at a goodwill store.
Total, all three stands cost me about $8.00 total, glue included!
I purposely looked for cups and plates of all different sizes to add more variety.


The salad sized stand will hold kiddie sized treats for the many tea party's that my two daughters like to plan with me. Perfect for tiny cookies and snacks.


The upside down tea cup stand will be perfect for taller treats like cupcakes or cake pops! I adhered the cup to the large bottom plate first. Once dried over night, I added the salad sized plate on top!


The double tea cup stand! I think this one is my favorite. I adhered the cups together first. Once dried I added them onto the bottom larger plate and decided to use a bowl for the top. Not only can it hold treats, but also butter or jam to spread on rolls in the top bowl!


Little Gal and her sister think I am ready for a party.
Tea anyone?

Don't be shy with your creations.
This project is proof that one lady's junk is another lady's treasure!

Cheers,


Friday, June 25, 2010

Contain it!

Re-using empty containers dates all the way back to the ice age I am sure. The only time it bugs me is when it is something you can not successfully re-label. For instance, I am sure most of you know someone who has 5 sour cream containers in their fridge, but they are not all sour cream? Kudos to them for recycling, but those are the items that need to go out with the recycling and be melted down and re-made. No one wants to forget what is in the container only to find something gross and smelly three weeks later.

My neighbor gave me an entire bag filled with these little tykes. Heavy duty and a twisty lid! The labels that were on them peeled right off. I had hard time coming up with an idea of what to put in them...but as I opened our craft cupboard my eyes were opened to an organizational project that would leave a smile on my face.

I kept it simple and just printed wording lengthwise and cut the paper into strips to be taped right on the container. Now little Gal will know what she is looking for and can keep it tidy when she crafts. No more dumping out the craft box all over the table! Yes!

I still have about 6 of these left...
I can't wait to decide what to use them for!


What are some creative ideas you have re-used your containers for?
Happy Organizing!

Cheers,


Tuesday, June 22, 2010

Adirondack Goodness!


I love Adirondack chairs. Love them. But I've never had $500 sitting around to purchase a couple and have therefore never owned any.

Pepper recently introduced me to one of my new favorite blogs: Knock-Off Wood. This amazing blog is the creation of a woman in Alaska who wanted Pottery Barn/West Elm style furniture but doesn't have the funding or stores accessible and so decided to create and share plans for fabulous knock-off DIY furniture!

I literally want to make everything on the site. If only I owned a lumber yard. And more tools. Sigh.

Anyway, as a first attempt at DIY furniture, my husband and I decided to make our own Adirondack chairs so we would finally have some cute outdoor furniture. So far we've made two chairs using a slightly modified design from Knock-Off Wood (We decided to round and fan the seat backs). We will someday add a matching bench and a table to have a complete outdoor set, but for now here's what we have:


Honestly, the project was not difficult. It was definitely time consuming and next time we won't make the mistake of assembling before painting...and we'll probably invest in a better sander...but it was fairly simple and we can't wait to make more furniture!

These two chairs cost about $120 to make ($60/ea). We could have done it for less but decided on the more expensive pine. Not bad when you consider the cost of these Pottery Barn chairs: $200/ea!

What will you build? 

Seriously, tell me what you're going to build. I want to know!


Tuesday, June 8, 2010

Sassy Swim Up cycle

Are you new to reading The Sassy Pepper? If so, you will soon become accustomed to seeing my two favorite things combined.

Why shouldn't it fan over into the swim section?

Pictured below are two swim suit tops that haven't seen a swimming pool in over two years.
The one shoulder tankini top is too boring...
Halter tankini top is so tight and small it would fit my Little Gal.

I suddenly found myself wishing to have the body back that I used to complain about before my three darling children came. Sigh.....


I contemplated using the too small tankini as a hand me down for Little Gal. But seriously, I was the one who really needed a confidence boost when it comes to strolling along side the pool. Do you agree that summer got here too fast?!?

After getting myself upset by trying on the too small tankini, I had cut it into pieces before I knew what happened! Luckily, I cut it into circles so that I could sew some fancy flowers onto the top that fit me best, spicing things up a tad!

FYI - it was strangely satisfying to cut up a swim suit that didn't fit right.


If you find yourself surrounded by stretchy fragments of swim attire...don't throw them away!
Use the satisfaction and pour it into some creative embellishment. Just remember:
use Nylon thread for swim wear so that the chlorine doesn't bleach it out.

Cheers,

Friday, June 4, 2010

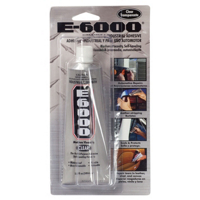
Tutorial: Amazing E-6000

E-6000 3.7 Ounce Clear Industrial Adhesive 230022 by Eclectic Products

Move over hot glue, I have a new love.
More like a "re-discovered" love. I feel guilty that I forgot about you E-6000!

If you haven't used this glue, you are in for a very good crafting experience.

See this little beauty below...


I was first inspired by some cupcakes I made. I wanted a really cute cake stand to display them on! I never did get around to making one yet...but I have a few ideas brewing now. I have had these crystal candy dishes and candle sticks since we were first married. They have been moved 7 times, and stuck inside cabinets for the past 9 years. Not used once, isn't that sad?
A little revamp, and voila! I will definitely use them now.

For this project I used:
Candy dish
Candle stick holder to match
E-6000 Adhesive
Q-tips
Patience


Deciding what you want to glue together is probably what takes the longest, aside from using your patience to wait long enough for it to dry and adhere the two pieces together really well.

FYI - E-6000 does have a "permanent marker" type fume.
I will leave it up to your discretion to use a mask or not. Please make sure that you are in a ventilated area so that you don't end up gluing something you didn't plan on.

Step one: Make sure your objects are clean and dry!

Step 2: Take your amazing E-6000 glue and spread it with a Q-tip onto each object you are gluing. You don't have to use a Q-tip for spreading, but it helps you not end up with globs of glue. A little goes a long way.

Allow it to sit for 10 minutes or so.


Step 3: Press the two pieces together, and clean up excess glue with another Q-tip.
Let sit 12-24 hours. I did it before I went to sleep so that the waiting didn't seem so long.

Step 4: Use your newly made contraption!

When I woke up I filled my little pedestal candy dish with m&m's and even ate a few at 8:00 in the morning! They truly tasted so much better coming out of an adorable candy dish!


What little things are you going to glue together?

Cheers,


Wednesday, June 2, 2010

Speedy Shutter Facelift

After painting my Craigslist benches, I realized I had quite a lot of paint left over. I thought, "Surely there must be a fabulous place to splash the rest of my fun Dragonfly paint."

Actually, I would never think something like that. What I really thought was: "I freakin' love this color and there is a lot left here...I need to paint something. Now!"

Then I looked up and noticed how boring my shutters were. I mean, just look at them. Off-white. Boring.


Clearly, my house needed some color. Seeing as I already had a paint color I loved and this little update wasn't going to cost me a cent, I got right to it! Actually, my rockin' husband got right to it. I didn't even ask him to do it, but suddenly he was on a ladder painting the shutters!

And here is the finished product:


What do you think? I love them. I seriously do. Such a simple change with a big impact. Next up: the front door.

Getting 'er done!